ITA
Il giorno di Halloween si avvicina e in tanti staranno pensando al costume da indossare.
Se avete deciso di mascherarvi da fatina questo semplice tutorial su come fare una bacchetta magica potrà tornarvi utile, naturalmente va bene anche per un costume di Carnevale!
ENG
Halloween is coming and a lot of people are thinking about what to wear.
If you want to dress up fairy this simple wand DIY will be useful! Naturally you can to use it also for a Carnival costume!
Occorrente:
Un bastoncino di legno (quello per gli spiedini) - Cartoncino colorato- Filo argentato- Glitters- Colla vinilica - Colore acrilico bianco - Forbici - Stampante.
ENG
Materials:
A wooden stick (such as that for the skewers) - Colored cardboard - Silver thread - Glitters - Vinylic glue- White acrylic paint - Scissors - Printer
-------------------------------------------------------------------------
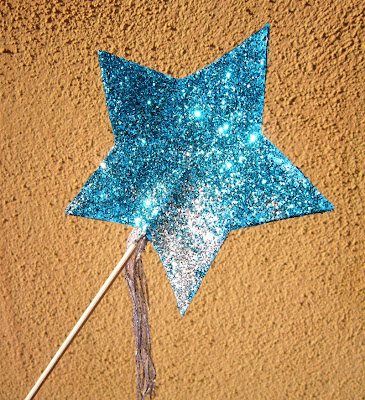
ITA Sovrapponete l'altra stella e pressate bene intorno alla punta del bastoncino. Lasciate asciugare quindi mettete un leggero strato di colla in modo uniforme e spargete i glitters senza lasciare spazi vuoti.
ENG Overlap the other star and press carefully around the stick. Allow to dry and put a thin layer of glue evenly. Sprinkle the glitters without gaps.
Il giorno di Halloween si avvicina e in tanti staranno pensando al costume da indossare.
Se avete deciso di mascherarvi da fatina questo semplice tutorial su come fare una bacchetta magica potrà tornarvi utile, naturalmente va bene anche per un costume di Carnevale!
ENG
Halloween is coming and a lot of people are thinking about what to wear.
If you want to dress up fairy this simple wand DIY will be useful! Naturally you can to use it also for a Carnival costume!
Occorrente:
Un bastoncino di legno (quello per gli spiedini) - Cartoncino colorato- Filo argentato- Glitters- Colla vinilica - Colore acrilico bianco - Forbici - Stampante.
ENG
Materials:
A wooden stick (such as that for the skewers) - Colored cardboard - Silver thread - Glitters - Vinylic glue- White acrylic paint - Scissors - Printer
-------------------------------------------------------------------------
ITA Dipingete il bastoncino di legno con il colore acrilico e lasciate asciugare.
ENG Paint the wooden stick with the acrylic paint and allow to dry.
ITA Ricavate tante frange dal filo argentato come nell'immagine.
ENG Obtain many fringers from the silver thread as in the image.
ITA Fissate le frange all'estremità del bastoncino con della colla e un nodo.
ENG Fix the fringes on the end of the stick with a bit of glue.
ITA Stampate due sagome della stella che è in fondo al post sul cartoncino colorato. Il cartoncino dovrebbe essere dello stesso colore dei brillantini, in alternativa potete colorarlo con dell'acrilico.
ENG Print two patterns of the star that is in the bottom of the post on the colored cardboard. The cardboard should be the same color of the glitters, in alternative you can paint it with acrylic paint.
ITA Spalmate una sagoma con la colla e fissate il bastoncino al centro.
ENG Spread the glue on the star shape and fix the stick in the centre.
ENG Overlap the other star and press carefully around the stick. Allow to dry and put a thin layer of glue evenly. Sprinkle the glitters without gaps.
ITA Lasciate acsiugare, togliete i brillantini in eccesso e TADAAA!!...La bacchetta magica è pronta!
ENG Allow to dry, remove the excess glitters and TADAAA!!..The wand is ready for use!
Alla luce sembra magica davvero!!
In the light it look really magical!!
 |
| Salvate questa sagoma sul vostro computer e stampatela! Save this pattern on your computer and print it! |


Perfect for all the little fairies this Halloween!
ReplyDeleteI love it. I don't have a fairy costume, but I want a wand!
ReplyDelete